
Settings

Manage your team, roles, permissions, and store configuration.

Roles & Permissions

How do roles control what staff can see and do?
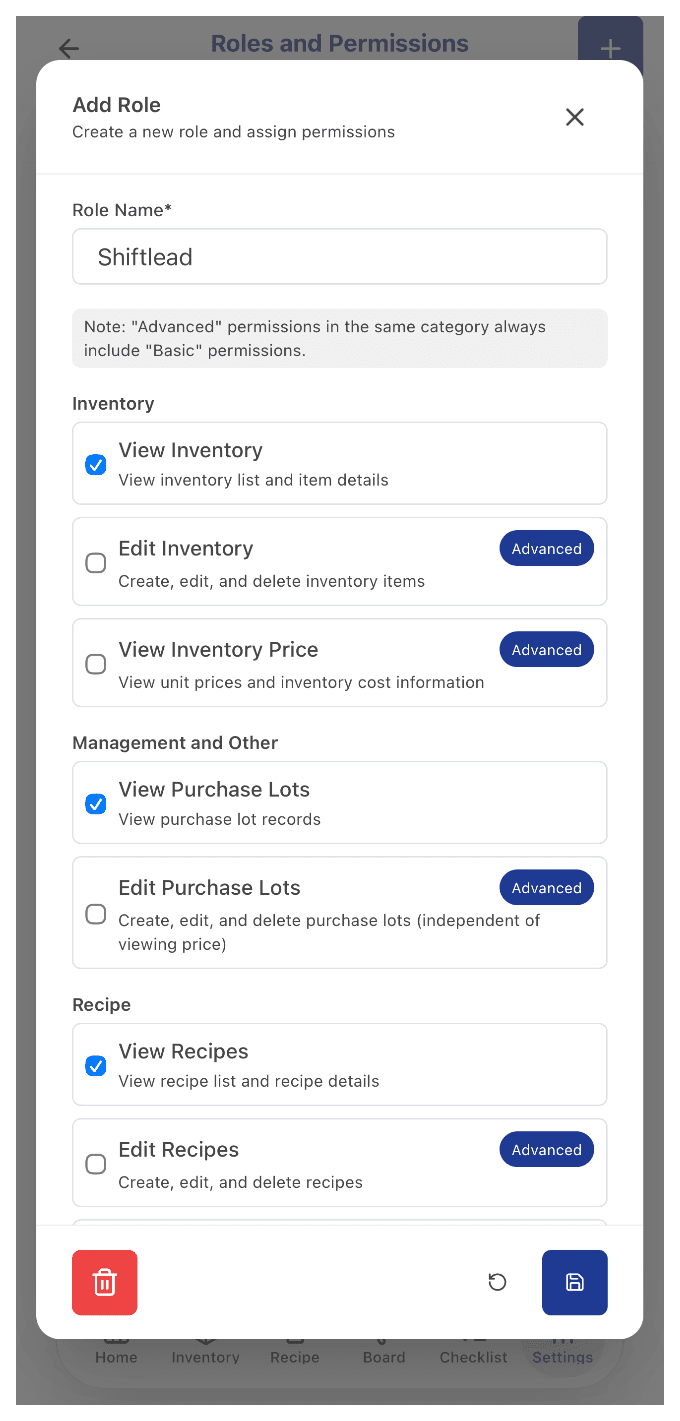
Add Role modal for a new "Shiftlead" role, showing grouped permission checkboxes with Basic and Advanced badges

Every team member is assigned a role, and that role determines which pages they can access and what actions they can take — for example, whether they can edit Inventory, view Recipe, or manage other users. Dinezy ships two built-in roles: Owner, with full access by default, and Staff, with View Board and Checklist access only by default. Everything in between — a shift lead, a kitchen manager, a bookkeeper — is a custom role you build with exactly the permissions that role needs.

  • Build from scratch — name the role and check exactly the permissions it needs, like this Shiftlead example
  • Basic vs Advanced — Advanced permissions (edit, pricing) always include their Basic (view) counterpart
  • Grouped by area — Inventory, Purchase Lots, Recipe, and more, each with their own View / Edit permissions

Last reviewed 2026-08-20
When should I create a custom role?

If the built-in roles don't match your team structure, go to Settings → Roles & Permissions and create a custom role with exactly the permissions you need.

Common examples: · Part-time staff — Board and Checklist access only, no visibility into costs or recipes · Kitchen lead — can view and edit Recipe, but no access to team management · Supervisor — can approve Inventory Checks and Checklist submissions, but no access to team management or store settings · Store Manager — full day-to-day operational access across Inventory, Recipe, Board, and Checklist, but no billing or role-management access

Last reviewed 2026-08-20

Team Management

How do I add a new team member?

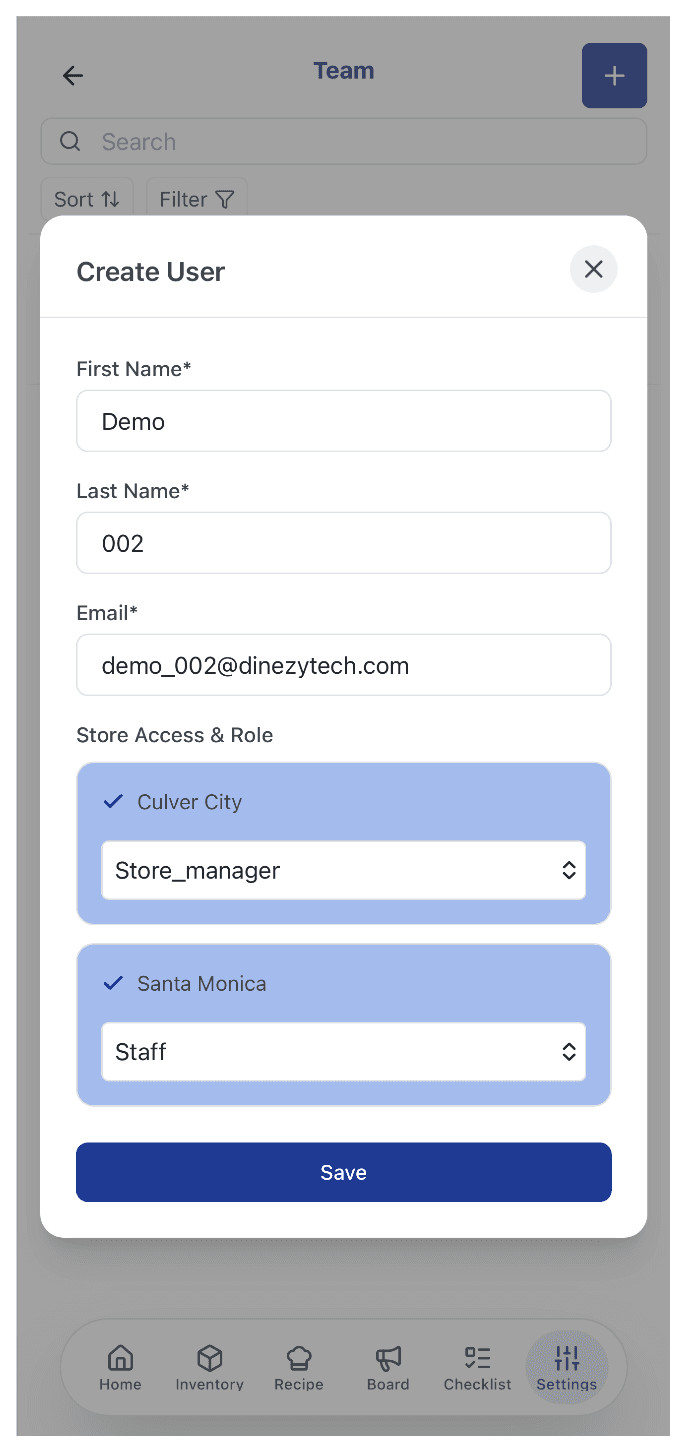
Create User modal showing First Name, Last Name, Email, and per-store Store Access & Role assignment

Go to Settings → Teams to invite new staff. Enter their name, email address, and assign a role, then submit. The system sends an activation email — the staff member clicks the link and sets their password to complete setup.

  • Name & Email — enter First Name, Last Name, and Email to send the invite
  • Store Access & Role — assign a different role per store — e.g. Store_manager at one location, Staff at another
  • Multi-store ready — add access to as many stores as the person needs, each with its own role

Last reviewed 2026-08-20

How do I change a team member's role?

You can update a staff member's role at any time from the Teams list — for example, promoting a part-timer, adjusting access as responsibilities change, or reducing access before an employee's last day. The change takes effect the next time they log in.

Last reviewed 2026-08-20

Store Configuration

How do I set up Storage Locations?

Create named storage areas under Settings → Storage Locations — for example, "Walk-in Fridge," "Dry Storage," or "Prep Counter." When adding inventory items, tag each one to a location so your team always knows where to find it. During Inventory Checks, filter by location to work through one area at a time instead of scrolling the full item list.

Last reviewed 2026-08-20

How do I add Suppliers?

Add your vendors under Settings → Suppliers. When creating inventory items, you can link each one to its primary supplier. This makes it easier to track sourcing and compare pricing across vendors over time.

Last reviewed 2026-08-20

Brand Settings

What can I configure under My Brand?

Settings → My Brand is where the Owner manages brand-level details — like your brand name and logo — that apply across every store under your account, rather than settings scoped to a single location.

Last reviewed 2026-08-20